Contributions to translations
Help make WordPress Playground accessible to a global audience by translating its documentation. This guide provides everything you need to know to get started. Contributing translations follows the same workflow as any other documentation change. You can either fork the WordPress/wordpress-playground repository and create a pull request (PR) with your changes or edit pages directly using the GitHub UI.
For a detailed guide on the contribution workflow (forking, creating PRs, etc.), please see our documentation contribution guide
How Translations Work
Playground's documentation site is built with Docusaurus, which handles the internationalization (i18n) features.
To learn more about how Docusaurus manages translations, see the Internationalization section of the official Docusaurus documentation.
Configuration
Available languages are defined in the packages/docs/site/docusaurus.config.js file. For example:
i18n: {
  defaultLocale: 'en',
  path: 'i18n',
  locales: ['en', 'fr'],
  localeConfigs: {
	en: {
		label: 'English',
		path: 'en',
	},
	fr: {
		label: 'French',
		path: 'fr',
	},
  },
}
File Structure
All translated documentation pages are located within the packages/docs/site/i18n/ directory, organized by language code.
For a language to work correctly, its file structure must mirror the original English documentation found in packages/docs/site/docs.
For example, the Spanish (es) translation for docs/main/intro.md must be placed at:
packages/docs/site/i18n/es/docusaurus-plugin-content-docs/current/main/intro.md.
If a translated file does not exist for a specific language, Docusaurus will automatically fall back to the English version of that page.
Generating Translation Files
When adding a new language, you can generate the necessary JSON files for UI strings (like button labels and navigation items) by running the following command from the packages/docs/site directory:
npm run write-translations -- --locale <LANGUAGE_CODE>
With the proper i18n docusaurus.config.js configuration and files under i18n when running npm run build:docs from the root of the project, specific folders under dist for each language will be created.
Testing Translations Locally
To preview your changes for an existing language:
- Modify or add a translated file in the appropriate language directory, such as
packages/docs/site/i18n/es/docusaurus-plugin-content-docs/current/. - From the
/packages/docs/sitedirectory, run the local development server for your target language. For example, to test Spanish (es):
npm run dev -- --locale es
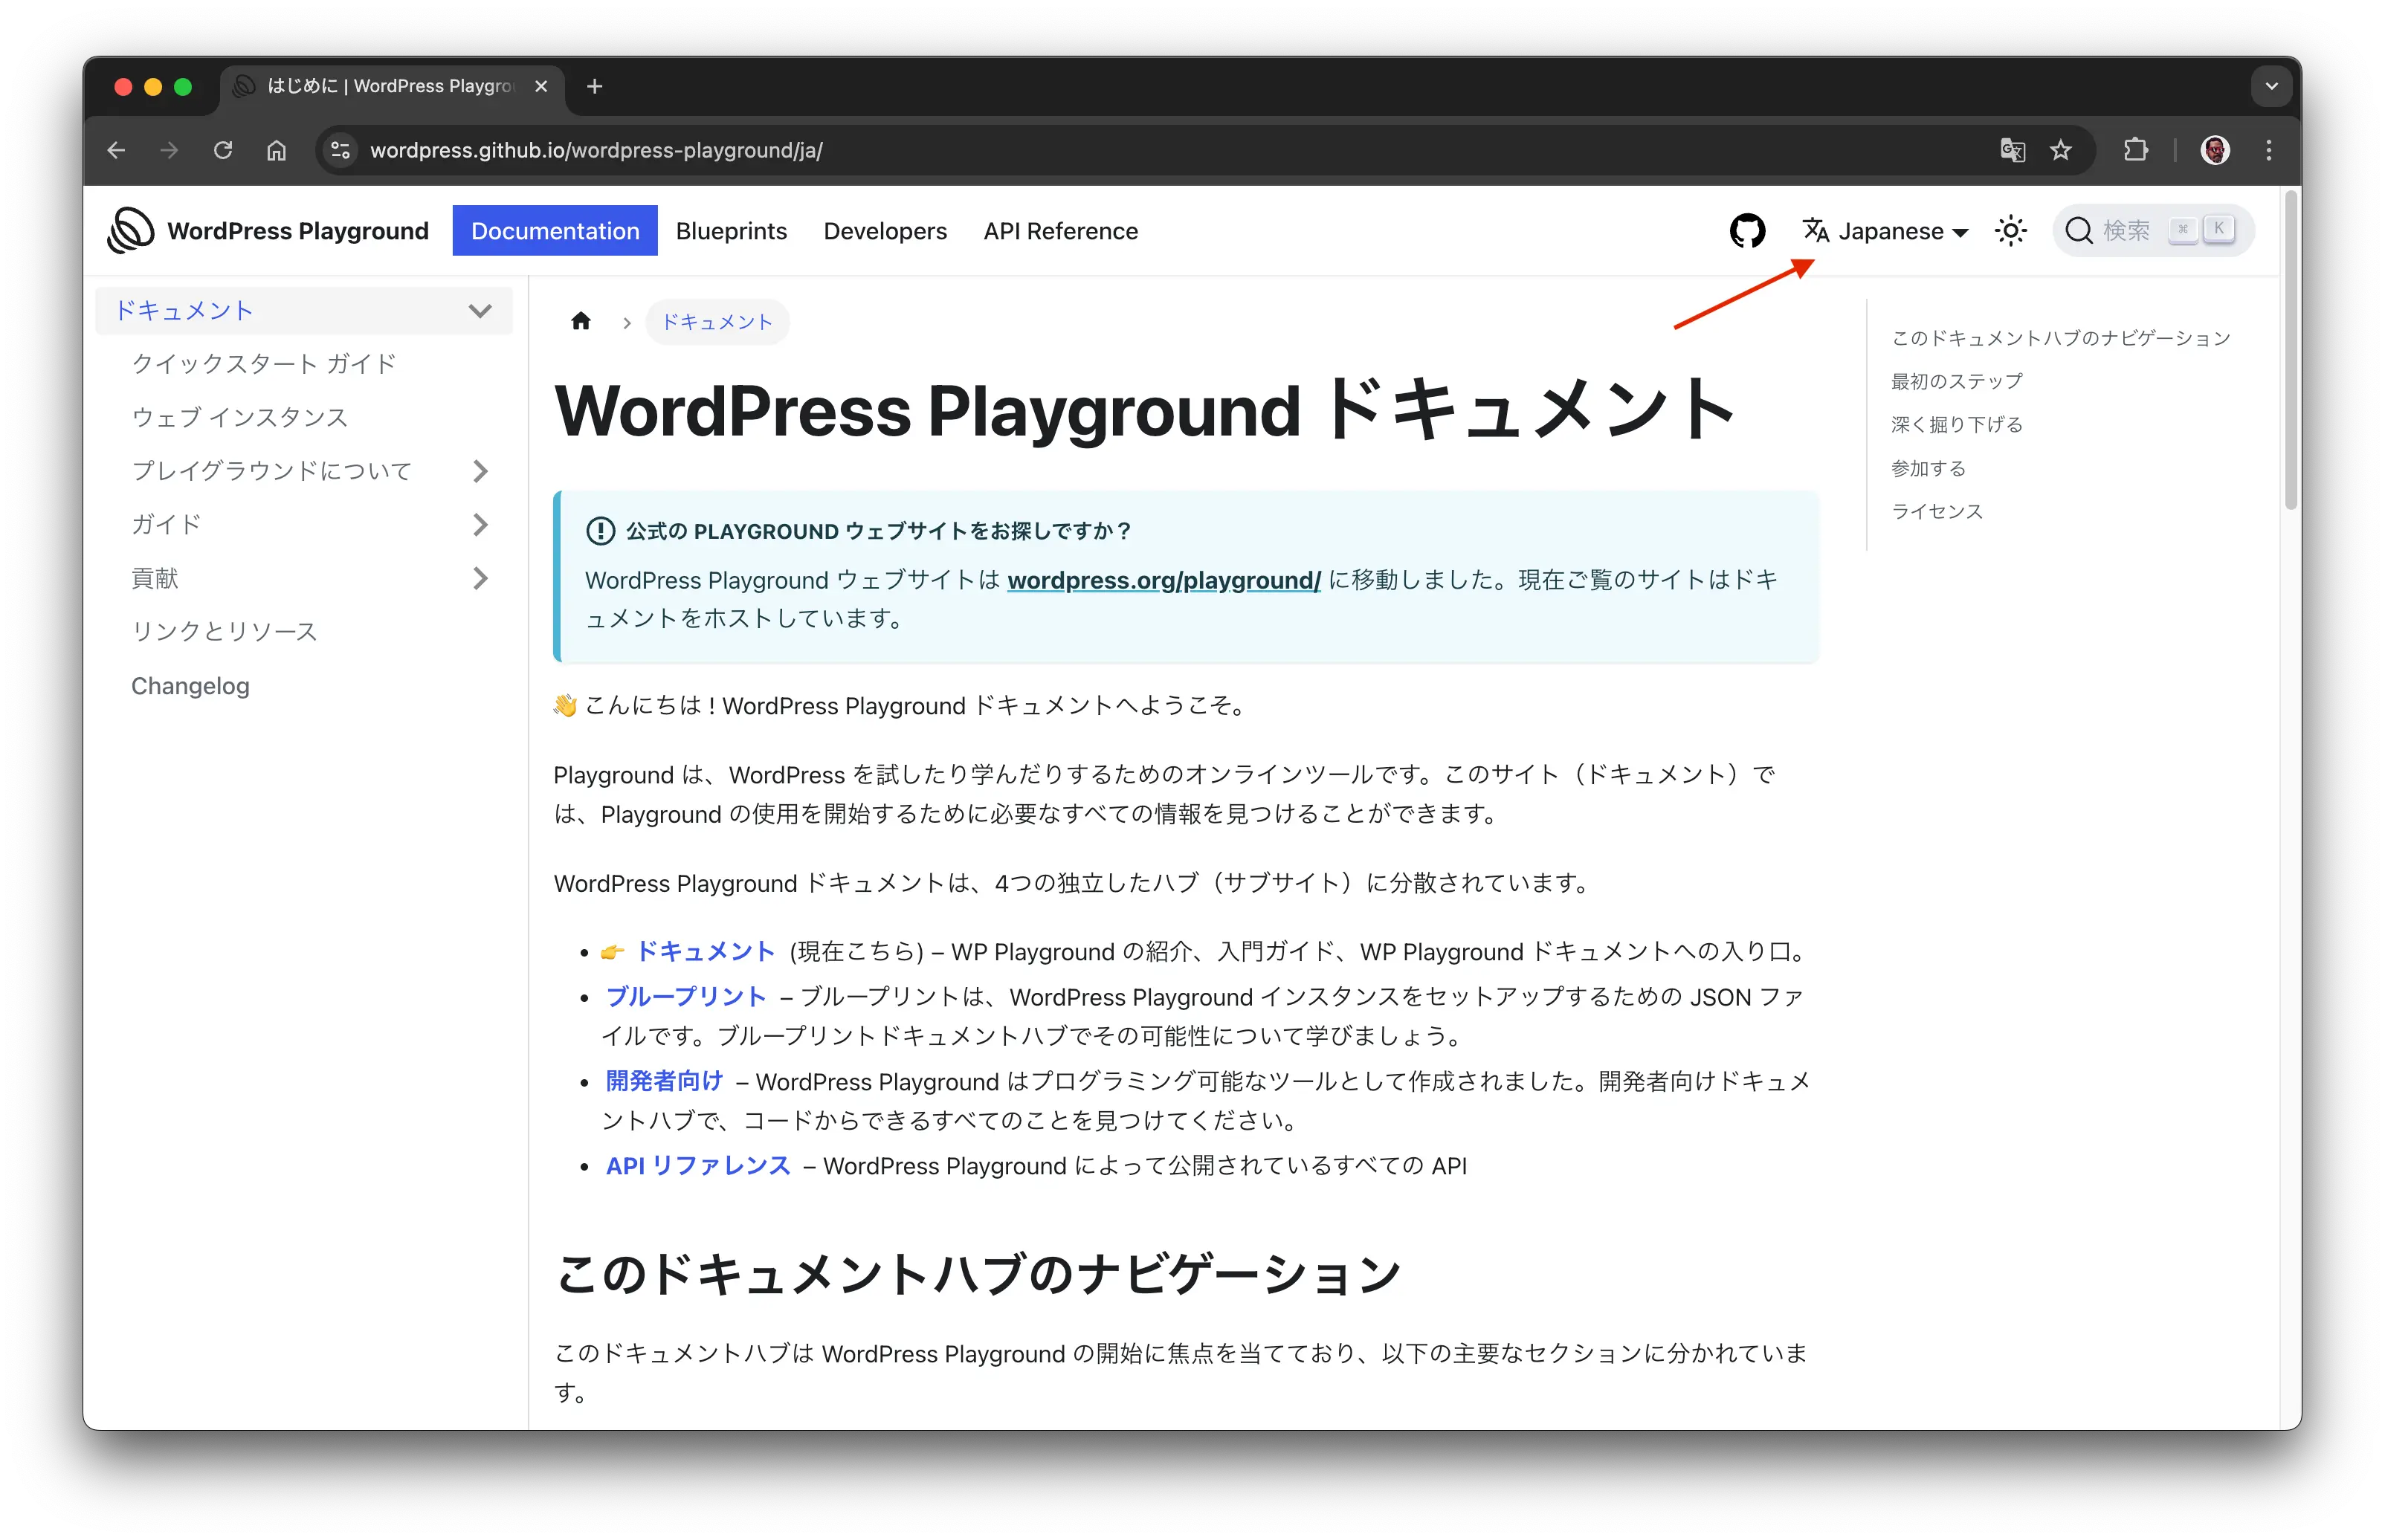
The Language Switcher
The language switcher is a dropdown menu that allows users to select their preferred language.
Making a language publicly available on the Language Switcher
We recommend only adding a language to the switcher when a significant portion of the documentation has been translated. This avoids a poor user experience where switching to a new language results in seeing mostly untranslated English content.
As a guideline, a language should be made publicly available in the switcher only when the entire "Documentation" hub is translated, including these key sections:
All languages are available once the i18n setup for a language is complete and the correct file structure is in place under i18n.
- https://wordpress.github.io/wordpress-playground/
- https://wordpress.github.io/wordpress-playground/es/
- https://wordpress.github.io/wordpress-playground/fr/
Assuming the fr language is the first language with the Documentation hub pages (Quick Start Guide, Playground web instance, About Playground, Guides,... ) completely translated to French, the docusaurus.config.js should look like this in that branch so npm run build:docs properly generate the fr subsite and only displays the french language in the localeDropdown language switcher.
  {
    "i18n": {
      "defaultLocale": "en",
      "path": "i18n",
      "locales": [
        "en",
        "fr"
      ],
      "localeConfigs": {
        "en": {
          "label": "English",
          "path": "en"
        },
        "fr": {
          "label": "French",
          "path": "fr"
        }
      }
    }
  },
  {
    "type": "localeDropdown",
    "position": "right"
  }
Translation Workflow
Follow these steps to translate a page:
- Check for an Existing Translation Issue: First, search the repository issues to see if a tracking issue for your desired language already exists. If it does, comment on the issue to claim the page(s) you would like to translate.
- Create a New Translation Issue: If no issue exists, please create a new one to track the translation progress for the language. You can model it after issue #2202 and use the markdown checklist below to track progress.
- Translate the File:
- Check if you have the latest version of the documentation
- Copy the original .md file from
packages/docs/site/docs/...to the corresponding path in the language directory (e.g.,packages/docs/site/i18n/<LANGUAGE_CODE>/...). It is crucial to replicate the original file structure. - Translate the content of the new file, keeping the original content commented out
<!-- English Content -->. - The assets are listed at
packages/docs/site/static/img/only place assets inside the translation folder when it requires localized content. - Once the translations are ready, check if the docs build script is running properly
npm run build:docs.
- Create a pull request with your changes
- Add a prefix to the title
[i18n]to help to identify the translations - Describe the pages that you translated
- Request a review at
#playgroundor#polyglotsatwordpress.slack.com
We highly recommend submitting pull requests with a small number of translated pages. This approach simplifies the review process and allows for a more gradual and manageable integration of your work.
Translation Tracking Template
You can use the following markdown in your tracking issue:
## Remaining translation pages

<details open>
<summary><h3>Main</h3></summary>

- about
  - [ ] build.md
  - [ ] index.md
  - [ ] launch.md
  - [ ] test.md
- contributing
  - [ ] code.md
  - [ ] coding-standards.md
  - [ ] contributor-badge.md
  - [ ] contributor-day.md
  - [ ] contributor-day-table-lead.md
  - [ ] documentation.md
  - [ ] index.md
  - [ ] releases.md
  - [ ] translations.md
- guides
  - [ ] for-plugin-developers.md
  - [ ] for-theme-developers.md
  - [ ] github-action-pr-preview.md
  - [ ] index.md
  - [ ] providing-content-for-your-demo.md
  - [ ] wordpress-native-ios-app.md
- [ ] changelog.md
- [ ] intro.md
- [ ] quick-start-guide.md
- [ ] resources.md
- [ ] web-instance.md

</details>

<details open>
<summary><h3>Blueprints</h3></summary>

- [ ] 01-index.md
- [ ] 02-using-blueprints.md
- [ ] 03-data-format.md
- [ ] 04-resources.md
- [ ] 05-steps.md
- [ ] 05-steps-shorthands.md
- [ ] 06-bundles.md
- [ ] 07-json-api-and-function-api.md
- [ ] 08-examples.md
- [ ] 09-troubleshoot-and-debug-blueprints.md
- [ ] intro.md
- tutorial
  - [ ] 01-what-are-blueprints-what-you-can-do-with-them.md
  - [ ] 02-how-to-load-run-blueprints.md
  - [ ] 03-build-your-first-blueprint.md
  - [ ] index.md

</details>

<details open>
<summary><h3>Developers</h3></summary>

- 03-build-an-app
  - [ ] 01-index.md
- 05-local-development
  - [ ] 01-wp-now.md
  - [ ] 02-vscode-extension.md
  - [ ] 03-php-wasm-node.md
  - [ ] 04-wp-playground-cli.md
  - [ ] intro.md
- 06-apis
  - [ ] 01-index.md
  - javascript-api
    - [ ] 01-index.md
    - [ ] 02-index-html-vs-remote-html.md
    - [ ] 03-playground-api-client.md
    - [ ] 04-blueprint-json-in-api-client.md
    - [ ] 05-blueprint-functions-in-api-client.md
    - [ ] 06-mount-data.md
  - query-api
    - [ ] 01-index.md
- 07-xdebug
  - [ ] 01-introduction.md
  - [ ] 02-getting-started.md
- 23-architecture
  - [ ] 01-index.md
  - [ ] 02-wasm-php-overview.md
  - [ ] 03-wasm-php-compiling.md
  - [ ] 04-wasm-php-javascript-module.md
  - [ ] 05-wasm-php-filesystem.md
  - [ ] 07-wasm-asyncify.md
  - [ ] 08-browser-concepts.md
  - [ ] 09-browser-tab-orchestrates-execution.md
  - [ ] 10-browser-iframe-rendering.md
  - [ ] 11-browser-php-worker-threads.md
  - [ ] 12-browser-service-workers.md
  - [ ] 13-browser-scopes.md
  - [ ] 14-browser-cross-process-communication.md
  - [ ] 15-wordpress.md
  - [ ] 16-wordpress-database.md
  - [ ] 17-browser-wordpress.md
  - [ ] 18-host-your-own-playground.md
- 24-limitations
  - [ ] 01-index.md
- [ ] intro-devs.md

</details>
Translating with the GitHub Web Interface
If you prefer not to use developer tools, you can easily contribute translations directly on the GitHub website. All you need is a free GitHub account.
This guide will show you how to both update an existing translation and add a brand-new one.
Updating an Existing Translation
-
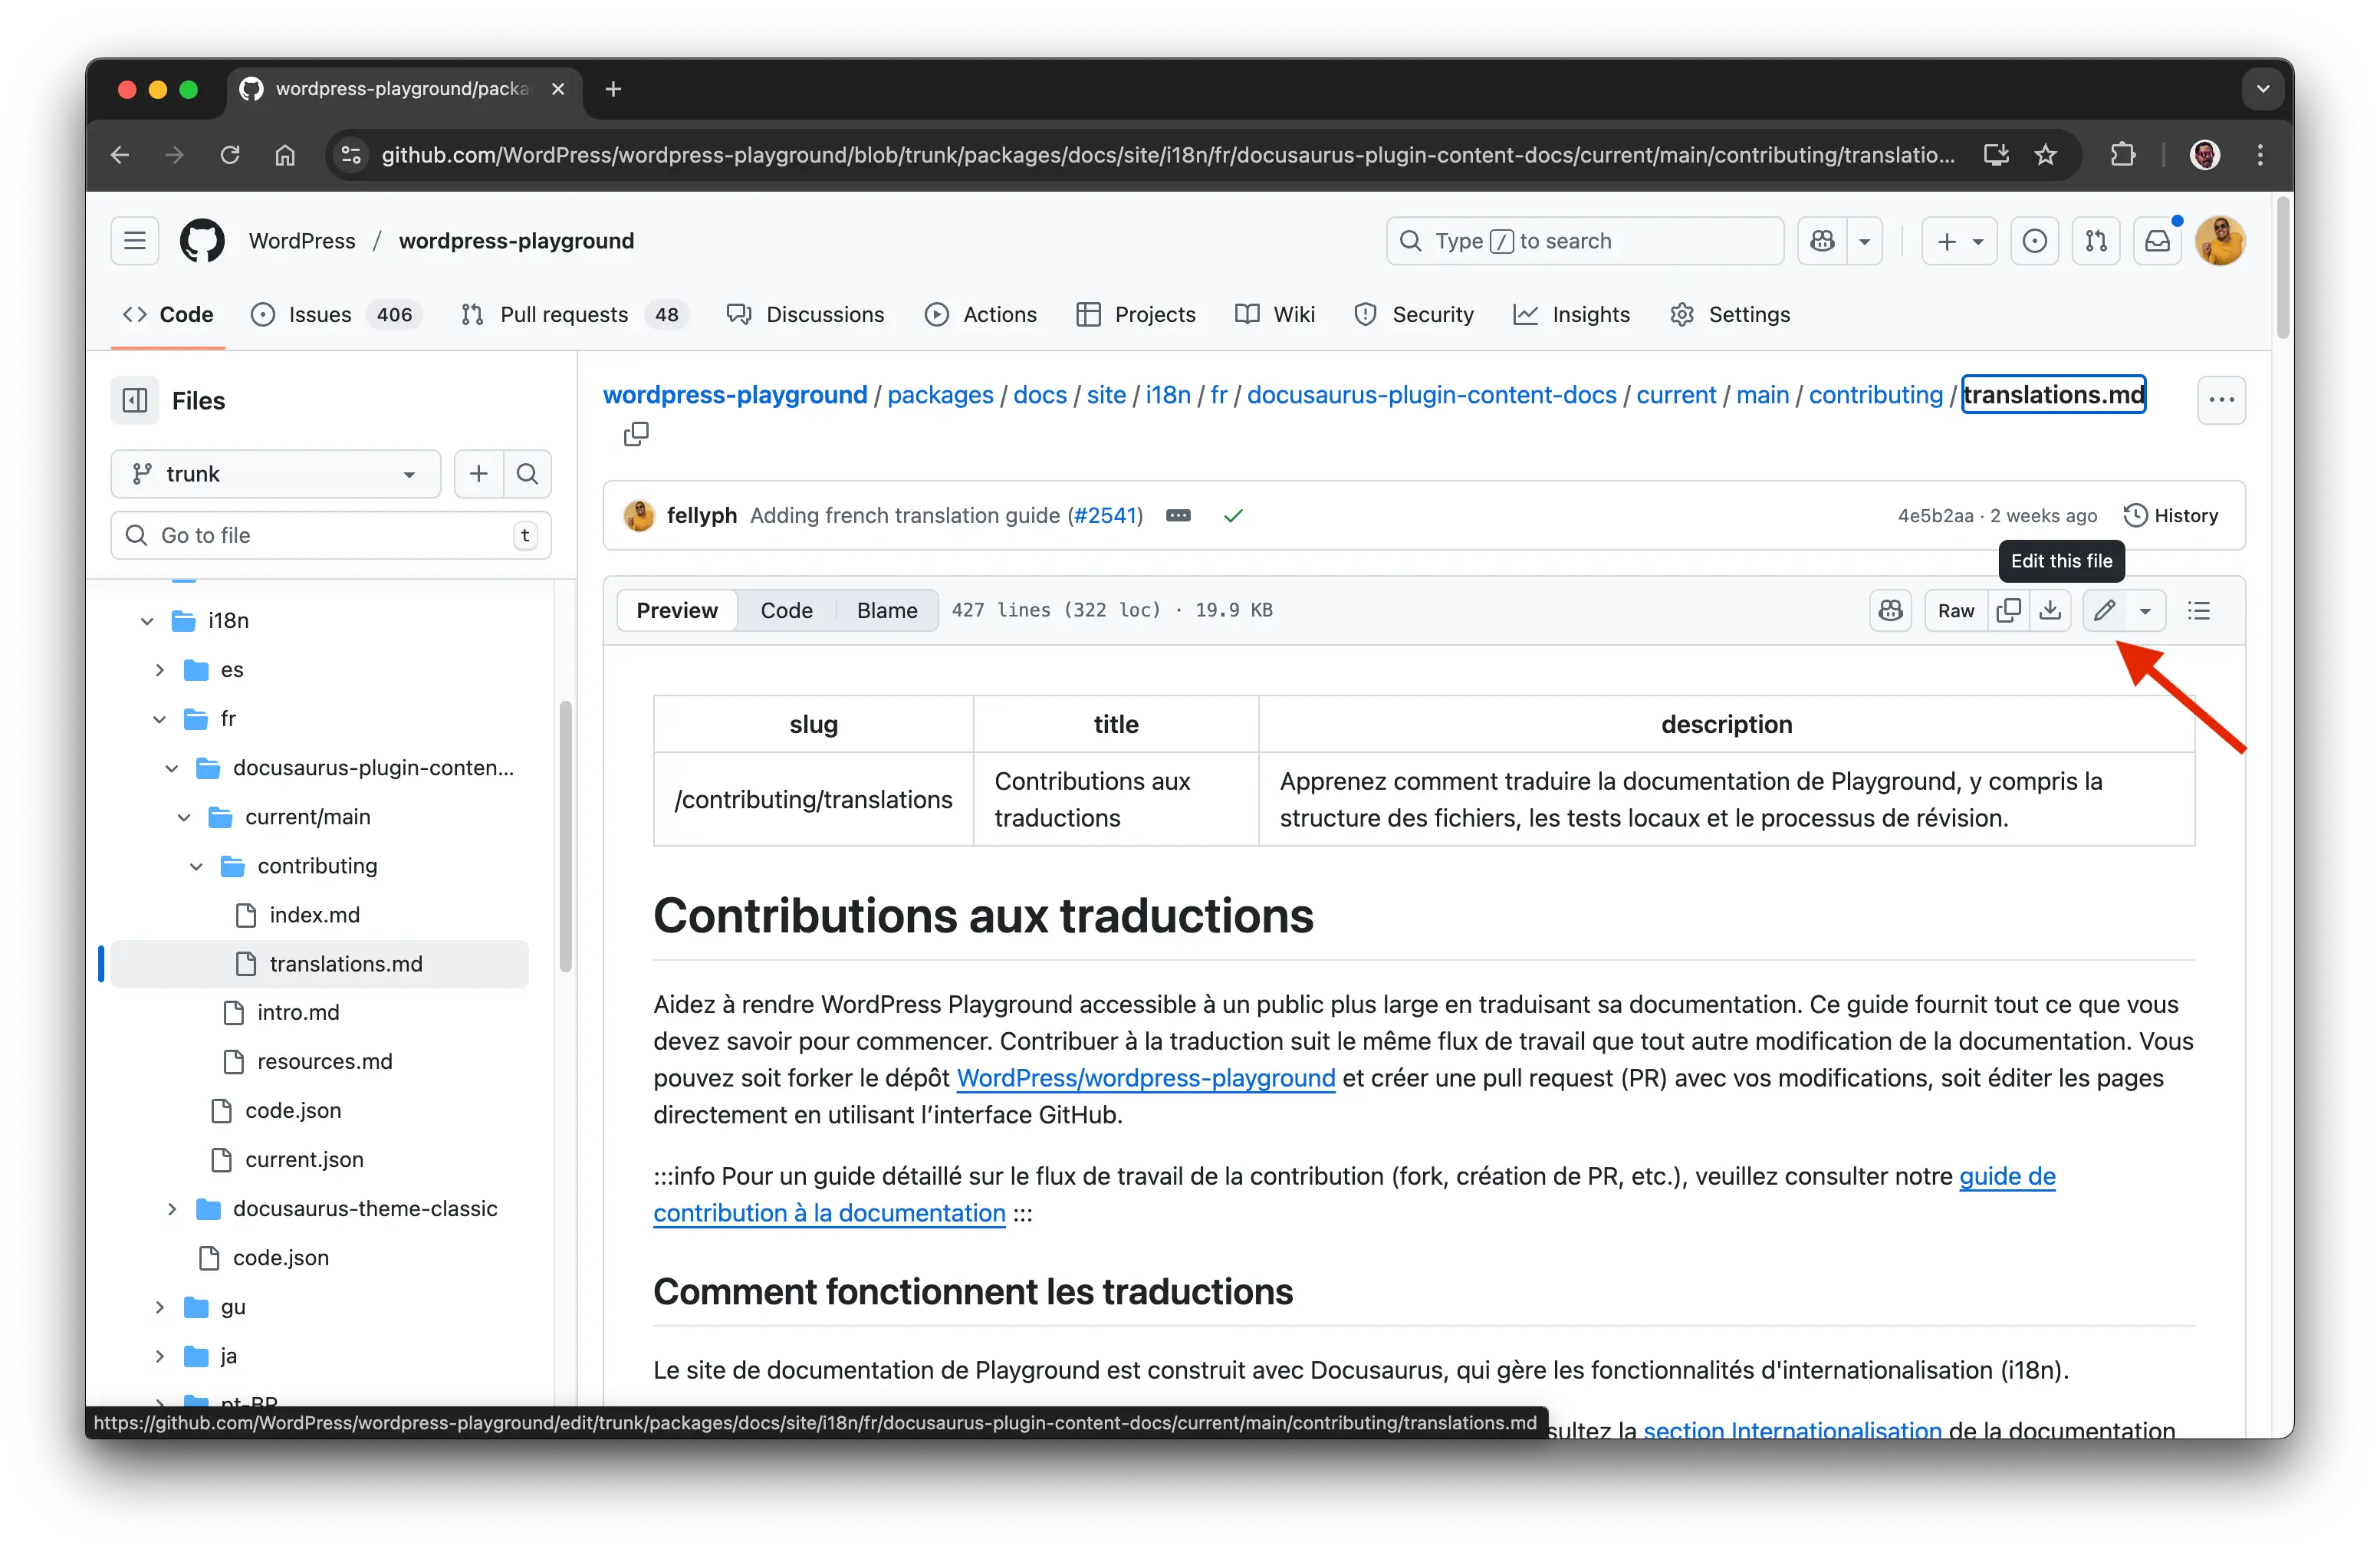
Navigate to the file. Go to the repository and find the file you want to update. Translation files are located in a folder named after their language code. For example, all French translations are in
packages/docs/site/i18n/fr/docusaurus-plugin-content-docs/current/. -
Open the editor. Select the file you wish to edit and click the pencil icon (Edit this file) in the upper right corner.
-
Fork the repository. GitHub will automatically prompt you to Fork this repository. This creates a personal copy for you to edit safely. Click the button to proceed.
-
Make your changes. The editor will open in your browser. Update the text with your improved translations.
-
Propose your changes. Once you are finished, scroll to the bottom of the page. Add a brief title and description of your changes (e.g., "Fixing typos in French translation") and click the Propose changes button.
-
Create a Pull Request. On the next screen, click the Create pull request button. This will submit your changes to the project maintainers for review.
Adding a New Translation
-
Determine the correct file path. The new file's path and name must mirror the original English file.
- English original:
packages/docs/site/docs/main/contributing/documentation.md - French translation:
packages/docs/site/i18n/fr/docusaurus-plugin-content-docs/current/main/contributing/documentation.md
- English original:
-
Create the new file. Navigate to the correct language folder (e.g.,
/packages/docs/site/i18n/fr/docusaurus-plugin-content-docs/current/). Click Add file > Create new file.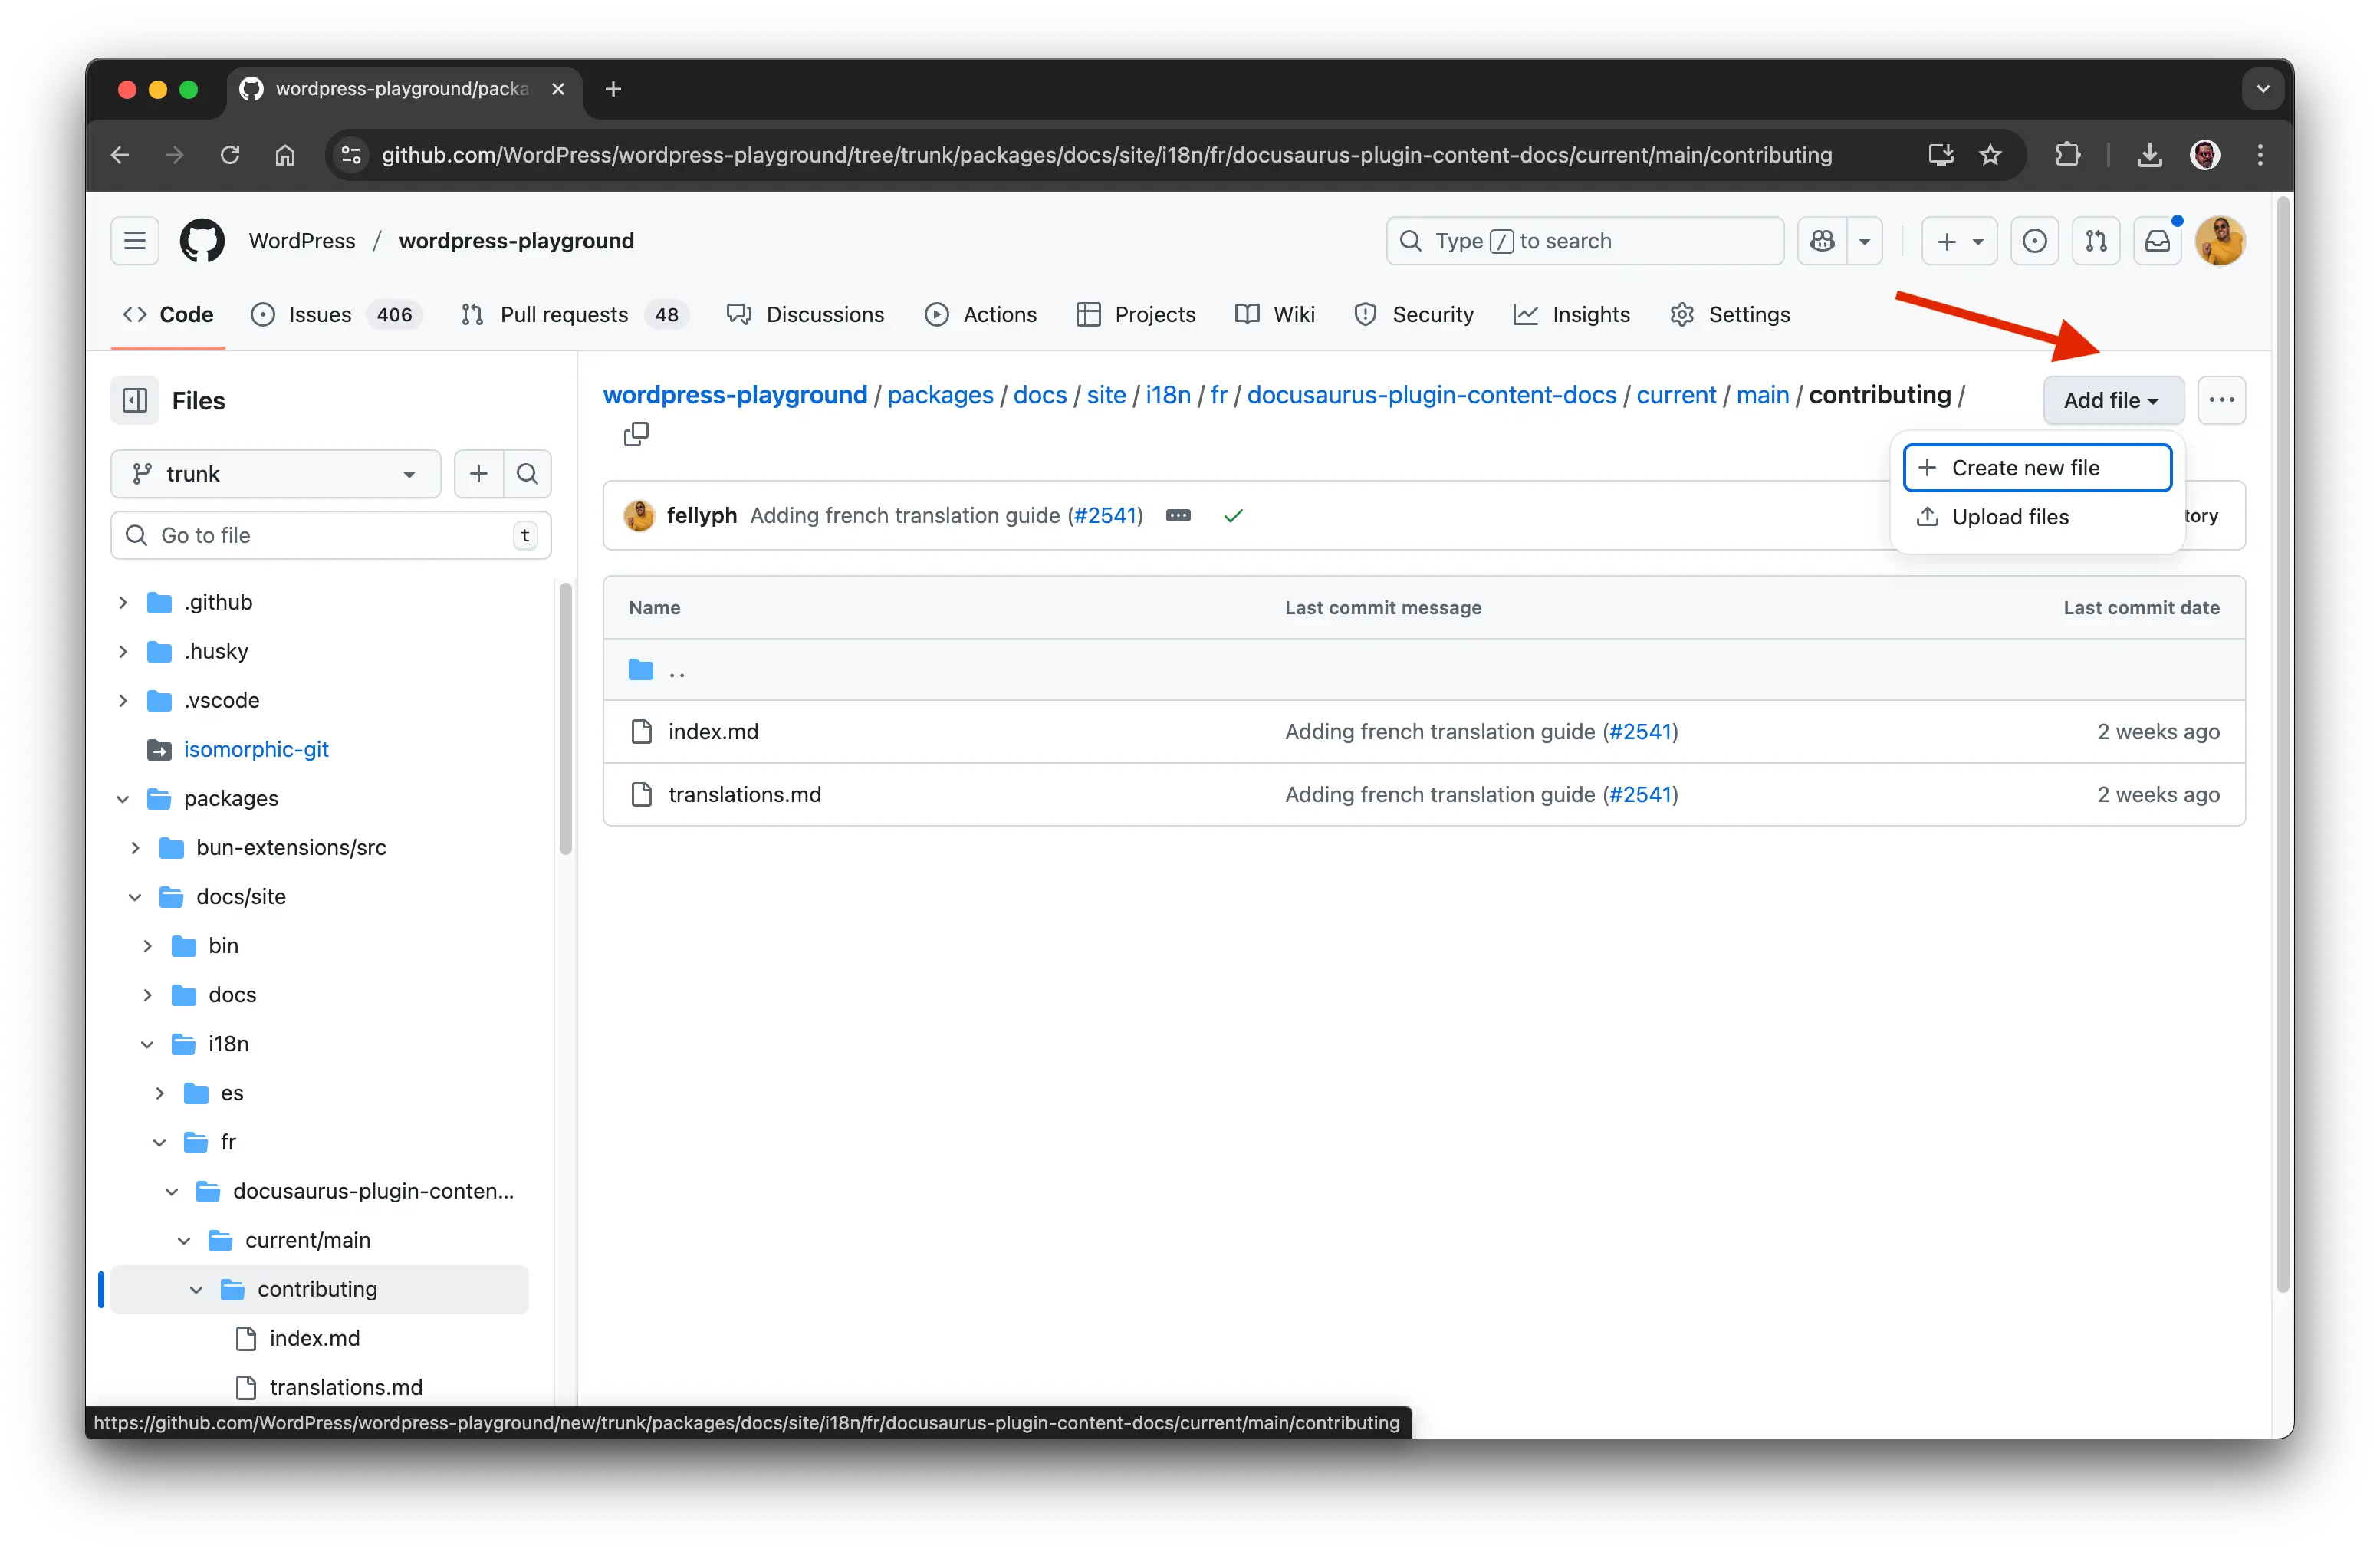
- Pro Tip: In the filename box, you can create new folders by typing the folder name followed by a
/. For example, typingmain/contributing/documentation.mdwill create themainandcontributingfolders automatically.
- Pro Tip: In the filename box, you can create new folders by typing the folder name followed by a
-
Fork the repository. Just like before, GitHub will prompt you to Fork this repository. Click the button to create your personal copy.
-
Add the translated content. The editor will open with an empty file. For the convenience of reviewers, please copy the content from the original English file and paste it into your new file, wrapping it in comment tags. Add your translation below it.
<!--
This is the original English content.
It helps reviewers understand the context of the translation.
-->

Ceci est le contenu traduit en français.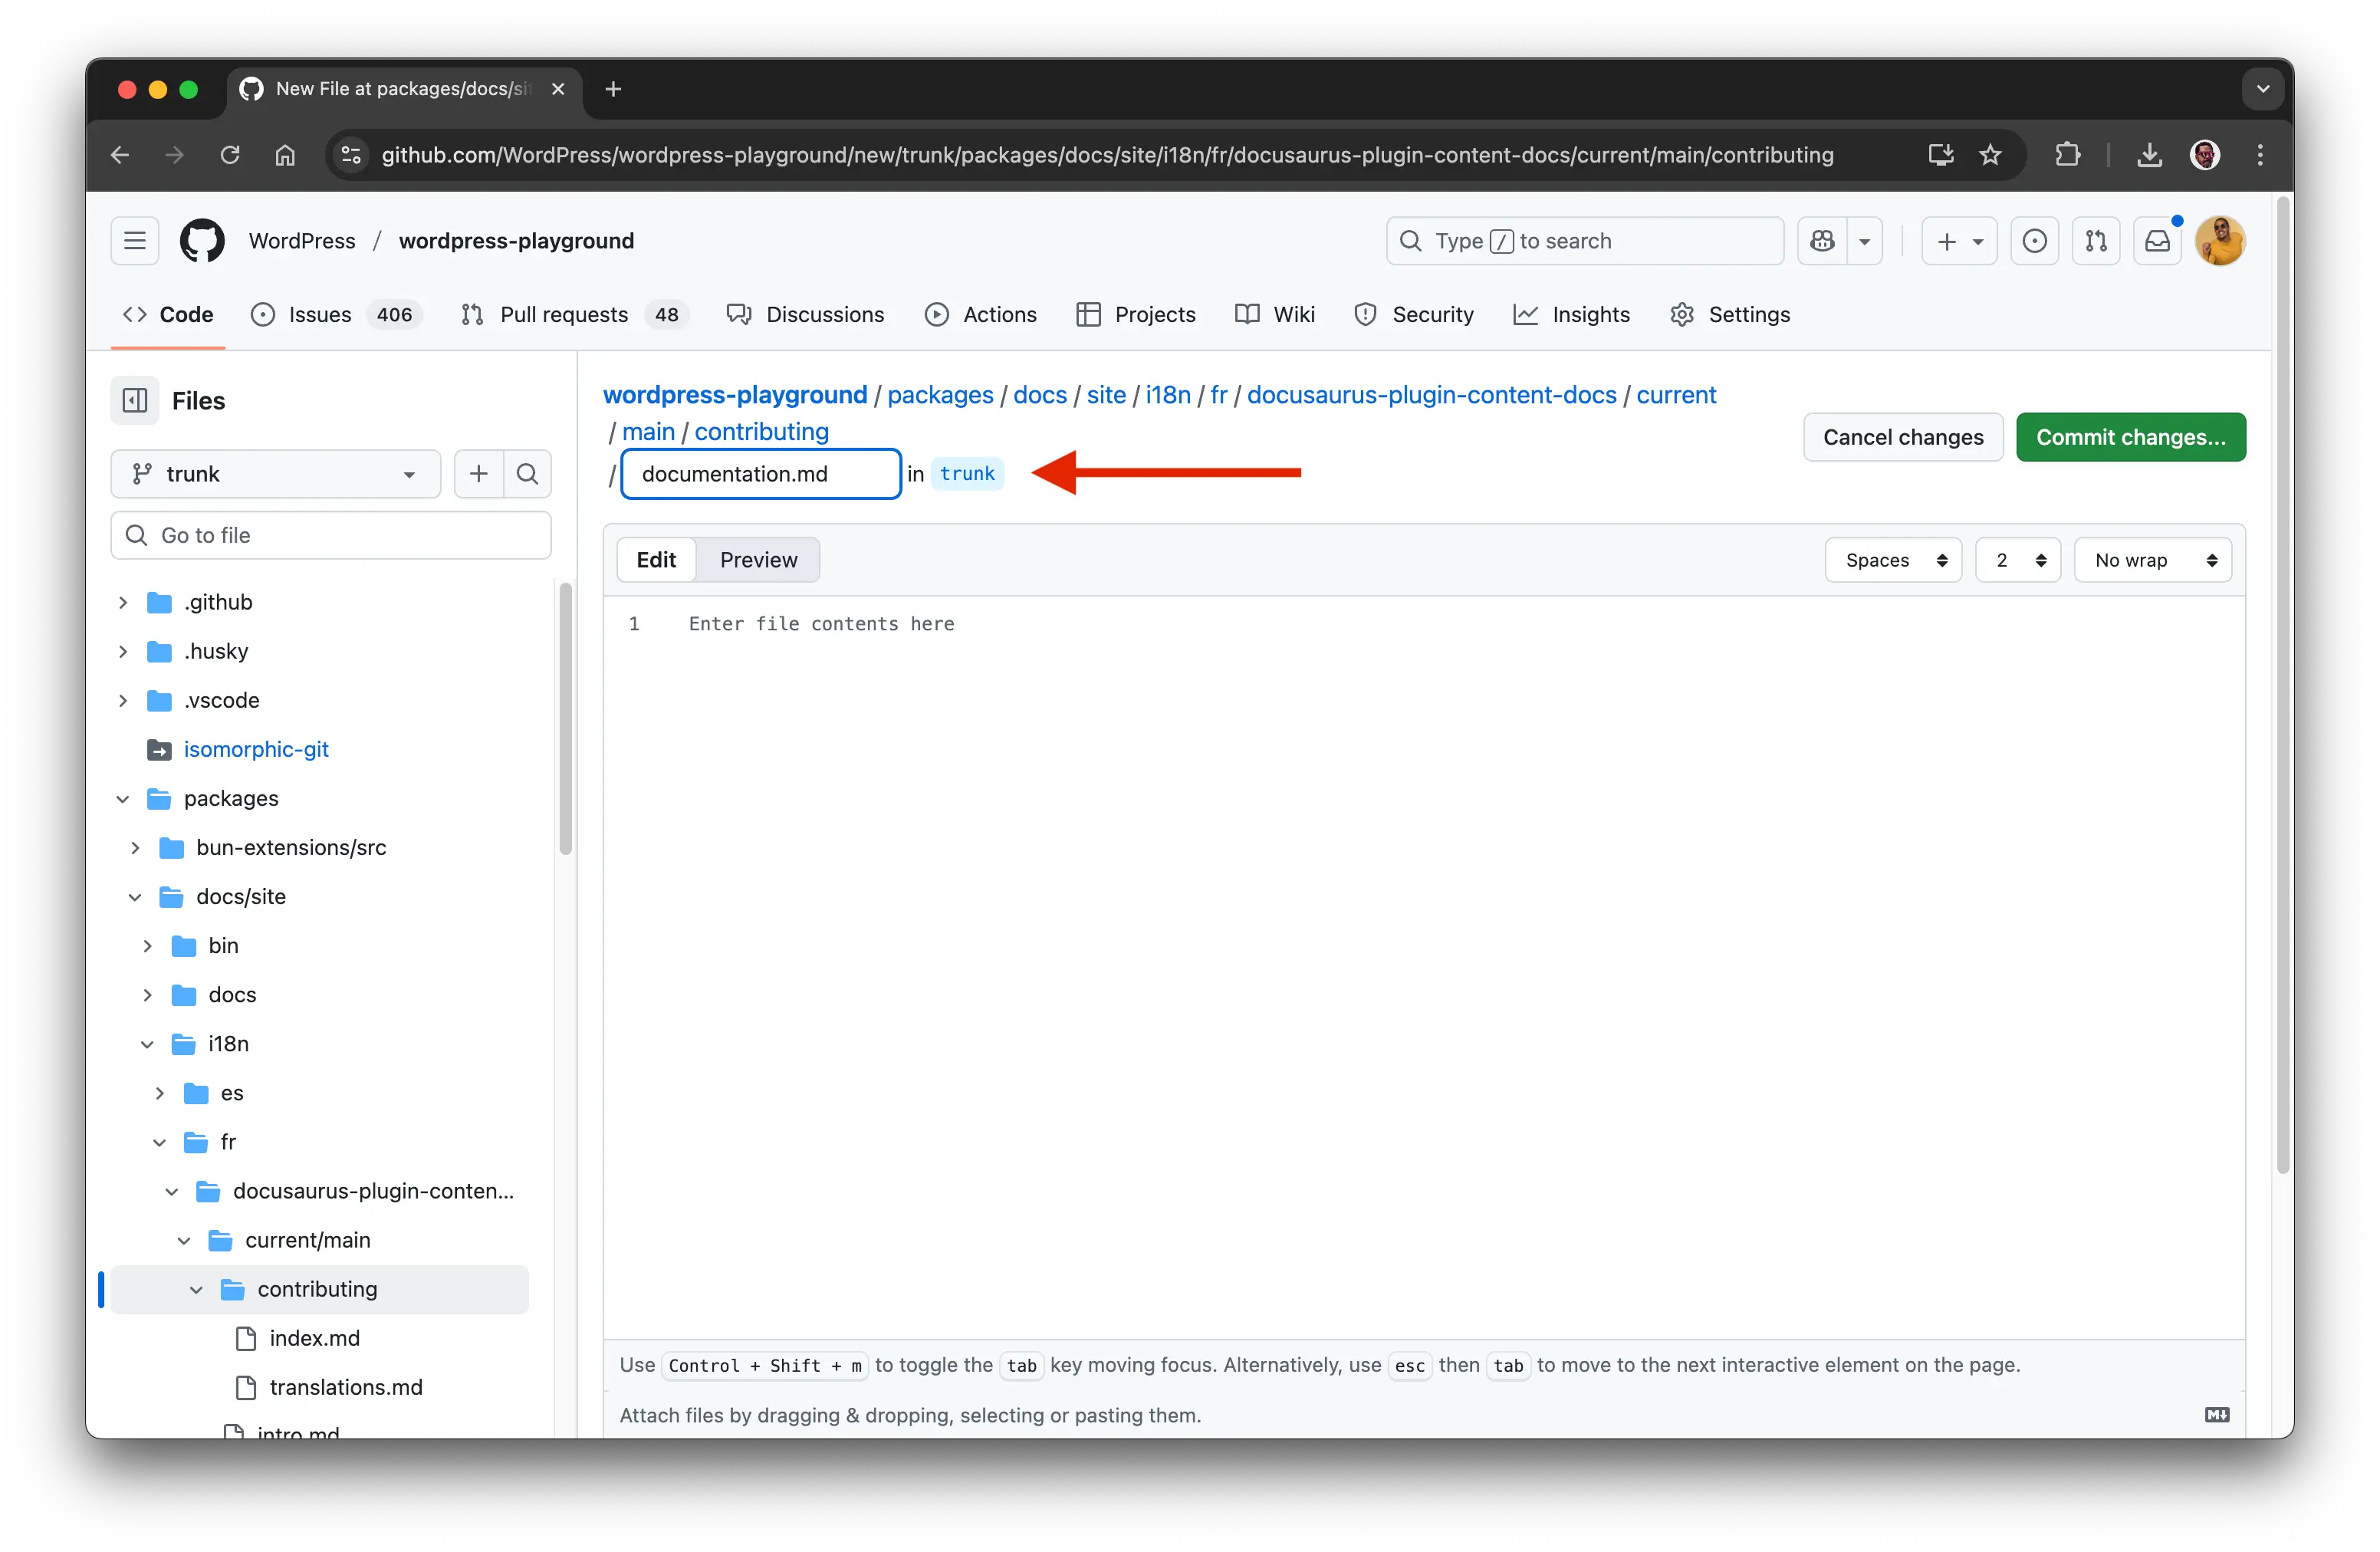
-
Commit the new file. When you are done, scroll to the bottom. Add a title for your new file (e.g., "Add French translation for documentation.md") and click the Commit new file button.
-
Create a Pull Request. On the next screen, click Create pull request to submit your new translation for review.
Review Process
To simplify the review process, please keep the original English text as a comment directly above the translated content.
<!--
👋 Hi! Welcome to WordPress Playground documentation.

Playground is an online tool to experiment and learn about WordPress. This site (Documentation) is where you will find all the information you need to start using Playground.
-->

👋 Olá! Bem vindo a documentação oficial do WordPress Playground.

WordPress Playground é uma ferramenta online onde podes testar e aprender mais sobre o WordPress. Nesta página(Documentação) irá encontrar todas as informações necessárias para começar a trabalhar com o Playground.
This practice also helps the maintenance team identify outdated translations. When the original English content is updated, we can search the codebase for the old text (now in comments) and flag the corresponding translation for review.
To find a reviewer fluent in the language of your PR, you can post a request on the Make WordPress Polyglots blog. Be sure to include the locale tag (e.g., #ja for Japanese) to notify the appropriate General Translation Editors (GTEs).
When the PR is merged, the translated version of that page should appear under https://wordpress.github.io/wordpress-playground/{%LANGUAGE%}, if you are contributing for the first time request your Contributor Badge.