Getting started
The WordPress Contributor Toolkit is a desktop application for macOS (Apple Silicon), Windows, and Linux that sets up a full WordPress core or Gutenberg development environment with zero prerequisites.
You install it, choose a directory and a project, click a button, and you have:
- A cloned
wordpress-developorgutenbergrepository - A running WordPress dev server
- The ability to make code changes and turn them into a patch or pull request
No Git, no Node.js, no npm, no Docker needed. Everything is bundled inside the application as JavaScript/WASM, powered by WordPress Playground.
Prepare at home before Contributor Day
Creating your first site downloads the full repository, installs its dependencies, and runs the first build. That means downloading a lot of files, so we recommend having at least one site fully set up a day or a few days before the event.
On Contributor Day, open that site and run Update to latest trunk. The app fetches the changes made since your initial setup and only reinstalls dependencies if they changed. Most packages will already be cached, which uses far less of the venue's shared bandwidth than starting from scratch.
Install the app
Download the latest build for your platform with the button above, then open the app.
If macOS blocks the app when you first open it, see Troubleshooting.
Your first contribution
- Click Create a site, choose a destination folder, and pick what to contribute to: WordPress Core (the default) or Gutenberg.
- Wait. The app downloads the repository, then installs the dependencies and runs the first build on its own — go and get a coffee. See The setup wizard.
- Click Start dev server.
- A browser window opens automatically. If not, open it by clicking the site URL — or the wp-admin link beside it, to go straight to the dashboard.
- Give the work a home: link a Trac ticket on a Core site or a GitHub issue on a Gutenberg site.
- Make changes to the code — open the site in your editor straight from the app.
- Click Review & submit changes to see a diff of everything you changed.
- Choose how to send it. Every site can open a pull request or save a patch for a mentor; a Core site can also attach the patch to Trac.
That's it — you've contributed to WordPress.
You are not left guessing what to do next
When a site has something pending — a setup step to run, a warning to act on, work in flight — that one block is ringed in amber and scrolls itself into view, and is announced to screen readers as Next step: …. A site that is set up, running and clean has nothing pending, so nothing is ringed. And when an action finishes — a patch saved, trunk updated, a pull request opened — a brief notice says so out loud rather than leaving you to check.
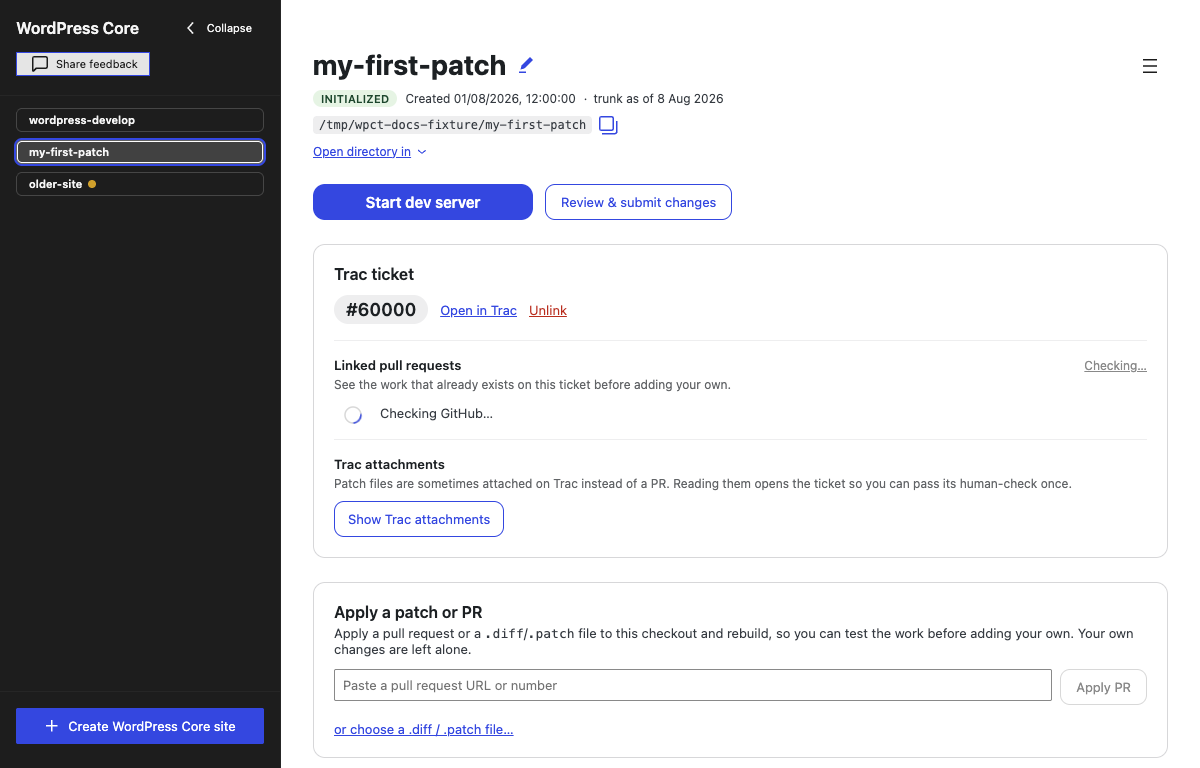
The rest of this guide walks through each of these screens in detail, starting with creating a site.
A second work item does not need a second site
Every ticket or issue you link gets its own branch inside the site and keeps its own work, so moving between two of them takes seconds instead of another clone and another install. See Working on several work items.
You never need a new site to get newer code
Update to latest trunk, in the ☰ menu at the top right of any site, is available at any time on any site, however old: it fetches the latest trunk, reinstalls dependencies if they changed, and rebuilds. See Staying up to date with trunk.
How it works under the hood
- Git operations run on a Git binary bundled inside the app (never one installed on your machine): cloning, switching work items, updating trunk, applying patches and checking out pull requests. Reading a patch and generating one are done by the app itself.
- Node scripts and npm commands run on the Node.js runtime bundled with the Electron app. A small shim directory is injected into the
PATHso subprocesses findnode,npm, andnpxwithout a system install. - The WordPress server runs on
@wp-playground/clifrom WordPress Playground, backed by SQLite. - Patches are generated with the
diffnpm package.